What is chalk paste - and why should you use it in your DIY projects? Discover the magic of chalk art in this beginner’s guide!
What is Chalk Paste? Introducing Your New Favorite Finish for DIY Projects
What is Chalk Paste?
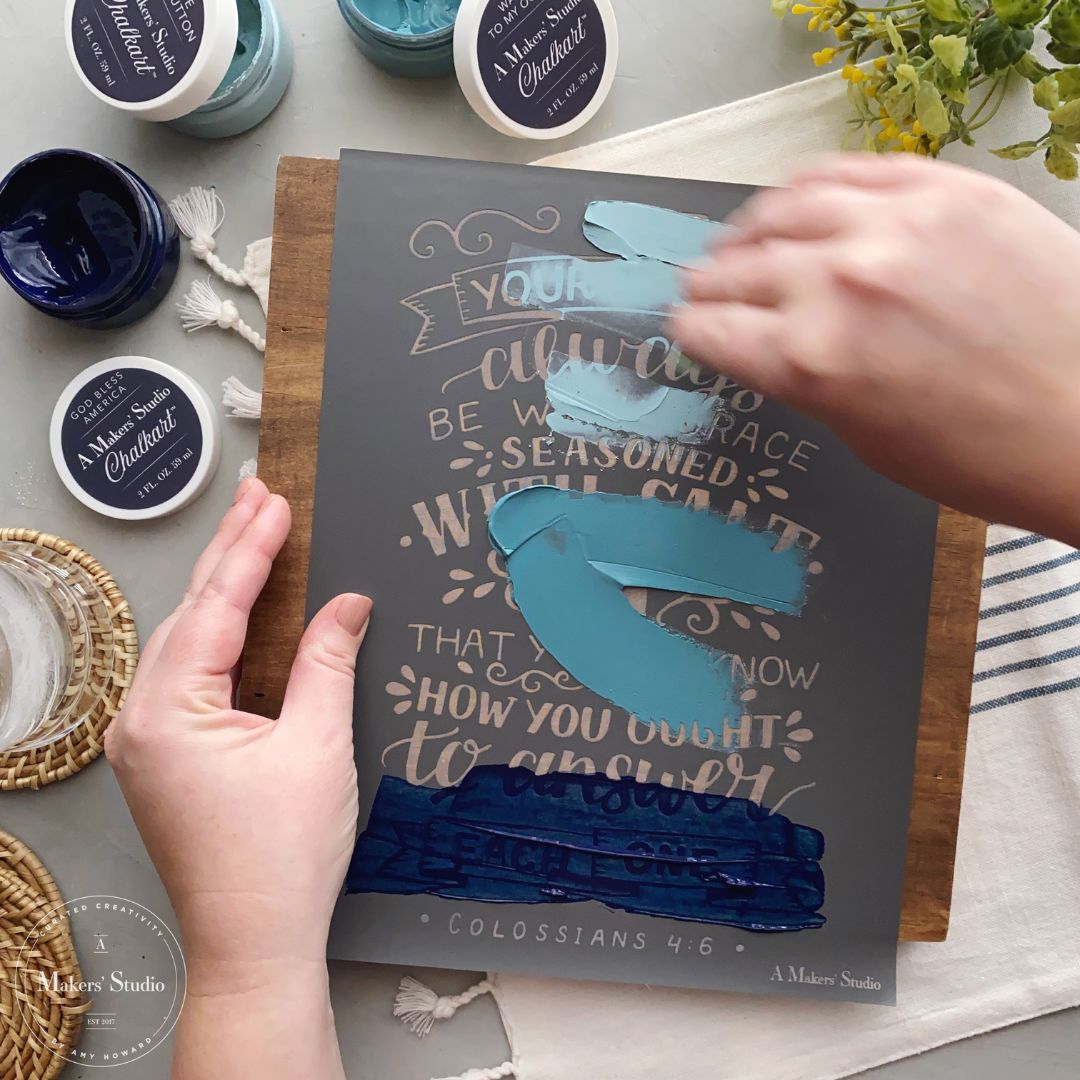
A Makers' Studio ChalkArt is a non-permanent water-based chalk paste that can easily customize your furniture, tabletop dècor, glass, and nearly any other non-porous surface. It is easy to work with, and can be removed with a damp rag or made permanent with our Matte Sealer. Use a ChalkArt Spread or Artist Brush to apply it free hand or in combination with a Mesh Stencil.
What you'll love:
- After drying for just 15 minutes, you will have a beautiful piece of lettering or artwork that will leave people wondering, "how did she do it?"
- Change up your design later by simply cleaning your piece with a wet rag and creating something brand new!
- Pair with our uniquely detailed (and patented!) mesh decorative stencils to create truly professional designs on almost any surface over and over again!
Join in the fun of customizing weddings and events, hostessing like a pro with beautifully designed placemats, creating magazine-worthy furniture updates, and more with ChalkArt.
What is Chalk Paste Made Of?
Our ChalkArt is a water-based formula curated specifically as a non-permanent craft paint. Enjoy creating your favorite designs and then washing them off to create something new. Or make your designs permanent by sealing with Matte Sealer.
What is Chalk Paste Good For?
Our ChalkArt is compatible with just about any finish: furniture, tabletop decor, glass, and nearly any other non-porous surface. Nothing is off-limits.
But, the versatility doesn’t end there. You’ll also love the fact that you can effortlessly wash your design off and refresh it with something new as you see fit! All it takes is a wet rag and your blank canvas is restored and at your service.
Using our Chalk Art is easy too. Pair it with our amazing selection of stencils, give it 15 minutes to dry, and just wait till you see the look on people’s faces when you show them what you created. You’ll leave them in awe, wondering how you did it. You can choose to let them in on your secret weapon or keep them guessing!

What Separates Chalk Art Paste From Other Finishes?
- Versatility: ChalkArt paste stands out due to its exceptional versatility. Unlike traditional finishes, ChalkArt can be used on a wide range of non-porous surfaces, including furniture, glass, metal, plastic, and more. Its adaptability allows you to transform ordinary objects into stunning works of art with ease.
-
Ease of Use: One of the most significant advantages of ChalkArt paste is its user-friendly nature. The paste is applied using an artist brush or ChalkArt Spreader making it accessible to crafters of all skill levels. Its smooth consistency ensures a seamless application and allows for effortless blending and layering of colors.
-
Removability: Unlike permanent finishes, ChalkArt paste is temporary and can be easily removed or modified. If you decide to change your design or update your decor, simply wipe away the paste using a damp cloth or sponge. This feature allows you to experiment fearlessly and evolve your creations over time. If you create a design that you want to keep, easily make it permanent by sealing with A Makers' Studio Matte Sealer.
How to Get Started Using Chalk Paste: Tips for Beginners
Gather Your Supplies: Start by gathering your essential supplies, including ChalkArt paste in your preferred colors, your chosen tool such as the ChalkArt Spreader or Artist Brush, and the surfaces you wish to customize. Ensure that your chosen surfaces are clean and dry before applying the paste.

Practice on Scrap Paper: Before diving into your main project, take some time to practice on scrap paper or spare surfaces. This will help you familiarize yourself with the paste's consistency, drying time, and blending techniques. Experiment with different brush strokes and layering methods to discover the effects you can achieve.
Start with Stencils: For beginners, using stencils is an excellent way to create precise and professional-looking designs. Place the stencil on your surface and apply the ChalkArt paste evenly using a spreader or brush. Gently remove the stencil before the paste dries to reveal your beautiful design.
Check out these popular Mesh Stencils:
Explore Freehand Techniques: Once you feel more comfortable, challenge yourself to try freehand techniques. Experiment with various brush sizes and strokes to create unique patterns, images, or lettering. Don't worry about perfection—imperfections can add character and charm to your project.
Experiment with Layering and Blending: ChalkArt paste offers endless opportunities for layering and blending colors. Apply one color as a base layer and let it dry before adding additional colors on top. Use a dry brush or sponge to blend the colors softly, creating stunning gradients and shading effects. You can even create an ombre look by using increasingly darker shades of a color blended side by side.
Final Thoughts on Our Beginner’s Guide to Chalk Paste
Want to learn more? Take a look at these related articles for more information about A Makers' Studio products and project ideas:
- How to Use Stencils
- What Are Stencils?
- How to Paint with Stencils
- How to Paint Stencils on Wood
- Best Stencils for Painting
- How to Clean Stencils
- How to Use Letter Stencils with Paint
- How to Make Stencil Art
Want to see the process of cleaning stencils? Watch this short video!
Leave a comment